Install and Configure Teradici APEX 2800 Offload Card

apex2800_lowpro

What is the APEX 2800 Offload Card?

The Teradici APEX 2800 is a PCoIP Offload card for your compute nodes. What this means is when PCoIP traffic is detected on your nodes, each node that has a properly configured APEX card installed, the PCoIP software encoding compute cycles can be offloaded (read: dynamically moved) to this card. This benefits the amount of VDI machines (more importantly your displays)  from being crunched by the processors to produce visuals.

Is there a benefit? Absolutely! We have roughly 40-75 Task Worker profiles on each host, that’s 80-150 displays being crunched by the processor on top of Windows, Office and other applications. That is a big load on the processor, by moving the PCoIP processing onto the APEX we can save time and resources for those items that really need the speed of the Xeon platform. For the current firmware only 100 displays can be offloaded, still that is a ton of compute processing saved by moving to this card!

Install the APEX 2800

So now that we understand what it does, let’s get one physically installed into a host and then install the VIB file and enable the offloading.

  1. If this Host is in production, move all powered on/off VM’s to another available host.
  2. Put Host in Maintenance Mode, Shutdown Host, disconnect all cables (power, etc)
  3. Install APEX 2800 card to available PCIe slot (document slot location, try and make location consistent for all hosts in cluster)
  4. Reconnect cables and power Host up
  5. Confirm Host is at DCUI ready screen
  6. Enable SSH on Host, leave in Maintenance Mode
Install APEX 2800 Drivers into ESXi

For this part make sure you have a SSH client like Putty and a SFTP client like WinSCP to transfer the VIB package to your host. Go to Teradici My Support (requires login) to download the latest verified VIB package for your version of Horizon View (we will be using the package for View 5.2) Now that we have all of our stuff, lets load up the VIB package!

  1. SSH has been enabled from the prior steps, SSH into host
  2. Fire up WinSCP and start a session to the host.
  3. In WinSCP browse to the location where you downloaded the ZIP package (i.e. Downlads) on the left pane, on the right pane browse to /tmp/ and move that package in that folder
  4. Back in Putty lets verify the file is there by entering this command: “cd tmp” then “ls” you should now see the .zip file in that folder
  5. To install the VIB package enter this command: ” esxcli software vib install -d /tmp/apex2800-version-esxi-versionxxxxxx.zip” hit enter
  6. After installation it will spit out an install summary, if you had an existing version that was upgraded it will tell you here
  7. Close WinSCP and Putty and reboot the Host from vSphere
  8. When the Host become available again, enable SSH and exit Maintenance Mode
Install APEX 2800 Drivers for Windows

At this point we have physically installed the APEX 2800 card, installed the VIB package to ESXi, the last piece is to install the OS aware agent .  Go to Teradici My Support (requires login) to download the latest version of the OS Agent. Let’s get started!

  1. The VM can be on the Host we just installed the VIB package on.
  2. On your VM locate the OS Agent download and run the “apex2800-version-rel-xxxxx.exe” install package.
  3. Next, next, next!
  4. Finish and Reboot
  5. Time to verify the PCoIP processing is being offloaded!
APEX 2800 Commandlets

Each of these commands can be run from a SSH session, so fire up Putty and let’s verify that it’s working!

View APEX 2800 Status

/opt/teradici/pcoip-ctrl -I

View VM Usage and Monitoring Status

/opt/teradici/pcoip-ctrl -V

Enable/Disable APEX 2800

/opt/teradici/pcoip-ctrl -d <device number> -e
/opt/teradici/pcoip-ctrl -d <device number> -x

Displaying VM Property Values

/opt/teradici/pcoip-ctrl -O

All APEX2800 Commandlets

VDI Performance – Part 1 – Gold Images

To build a house you have to start with a solid foundation, I hate that saying but it’s true. It applies to VDI just the same: to have an efficient VDI environment you MUST have consistent gold images. The term gold image is what I use to base all of my View Pools on. I have a 3 step process to building my gold images:

  1. Create OS Template
  2. Create Gold Image
  3. Install Core Company/Pool Specific Software

Before I start with building my Pool Specific Gold Images I start with a Base Operating System Template for vCenter, this allows me to clone for Gold Images, Dedicated VM’s or Test Boxes with all specific Tools, Agents and other items that must be installed for a View Environment. This is the most important step in the process because this truly is the foundation for all future Gold Images in my environment. Let’s get to work!

Create OS Template

Create New Virtual Machine

In vSphere I create a new virtual machine called “Win7Gold”, I select “Custom” configuration with the following specs:

  • Name your VM
  • Choose an Inventory Location
  • Choose Host/Cluster Location
  • Choose Resource Pool (If DRS is enabled)
  • Select a Storage Resouce (Local or Shared Storage)
  • Virtual Machine Version (since I am running ESXi 5.5 I choose the latest)
  • Guest OS Version (For this example I am using Windows 7 x64)
  • CPU Sockets/Cores – 2vCPU
  • Memory – 3GB (View Best Practices say 3GB minimum)
  • Network – Choose Network and Adapter – VMXNet3
  • SCSI Controller – LSI Logic SAS
  • Create a new virtual disk (unless importing from an existing disk)
  • HDD – 32GB Thin Provision (This is a template, no need to build out the whole disk)

vCenter will now build out the base VM, time to edit some hardware!

  • Remove Floppy (You can always add to a specific Gold Image later if needed)
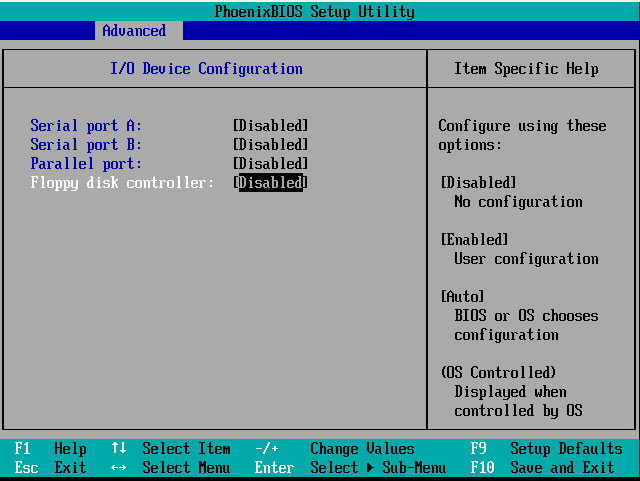
  • Select “Options” tab and review the Boot Options
    • Select “Force BIOS Setup”
  • Power on VM and Open VM Console
  • VM will boot into BIOS, select Advanced Tab
  • Disable all of those ports (You can always add to a specific Gold Image later if needed)

BIOS Disable Peripherals

  • Save and Exit
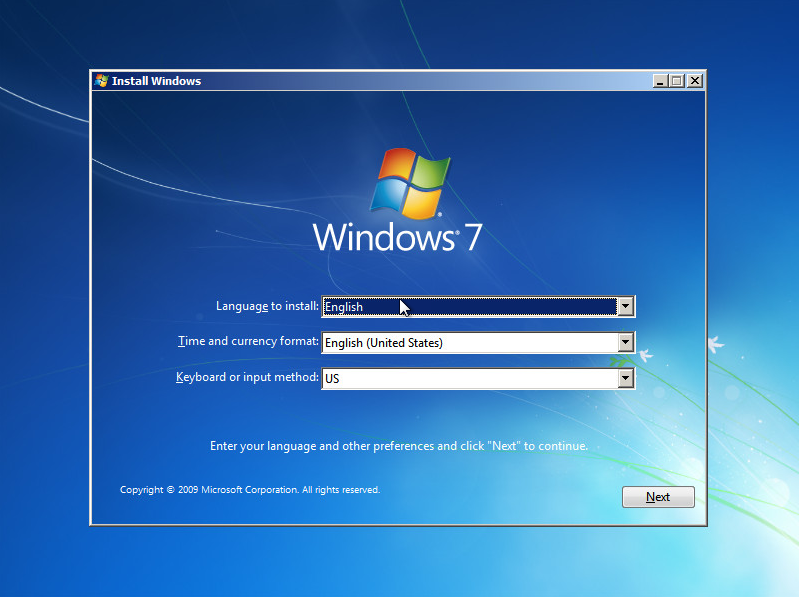
  • Back in vCenter – Edit VM Settings and Mount OS Media ISO (Make sure to check “Connected” and “Connect at Power On” and install your Operating System

Win 7 Install

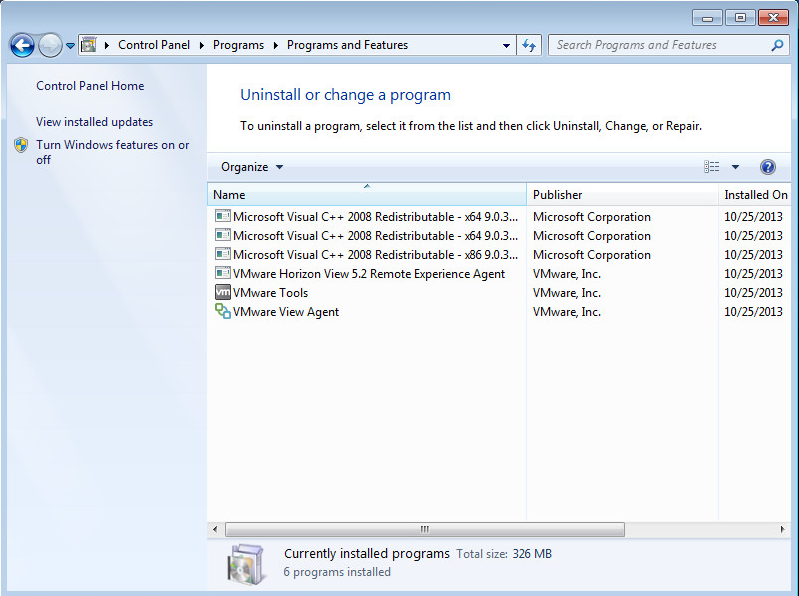
  • Once Windows has finished installing we need to install some VMware packages before anything else because of conflicts with .Net Framework and View Agent

VMwareInstalledPrograms

Next step is to optimize Windows for Horizon View, VMware has a great guide for optimizing including a script to run, I am a little more visual and discovered VMware Flings. Flings has a great application called VMware OS Optimization Tool that can automate a lot of the tweaking for your OS Template, so let’s use it to tweak!

FlingResults

Once the Fling is installed let’s run an analysis and optimize everything except: Windows Firewall (for VMware Blast), Windows Update (latest and greatest updates) and Windows Search. Notice how only 4 are left? Everyone’s tweaks will be different but there are recommended and optional ones you can review!

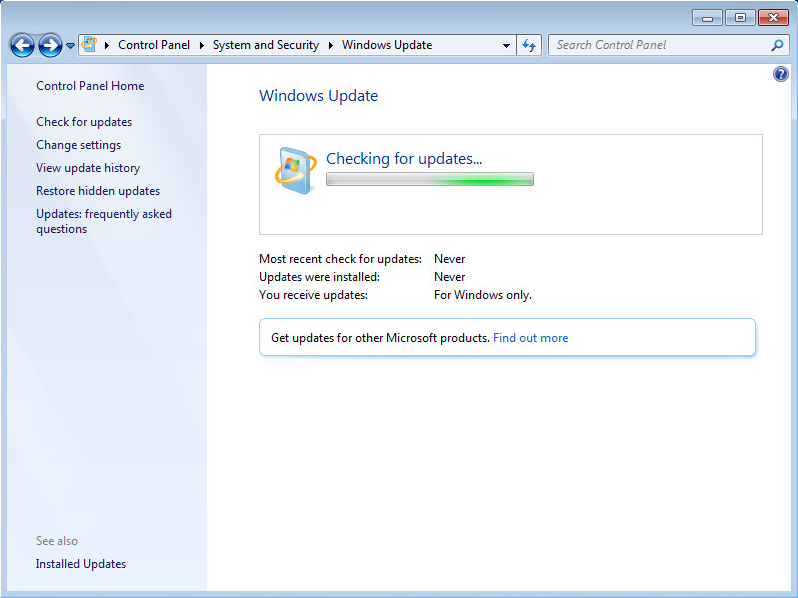
Once you have optimized with Flings uninstall the OS Optimization Tool and lets get Microsoft Updates installed.

WindowsUpdates

Once Windows gets all of it’s updates (I don’t install IE10) There is one last update that we need to install related to the VMXNet3 driver (KB2550978). After this you can go into Services and disable Windows Update. Once that is disabled we can delete the update leftovers from

C:\Windows\SoftwareDistribution\Download

WindowsFeatures

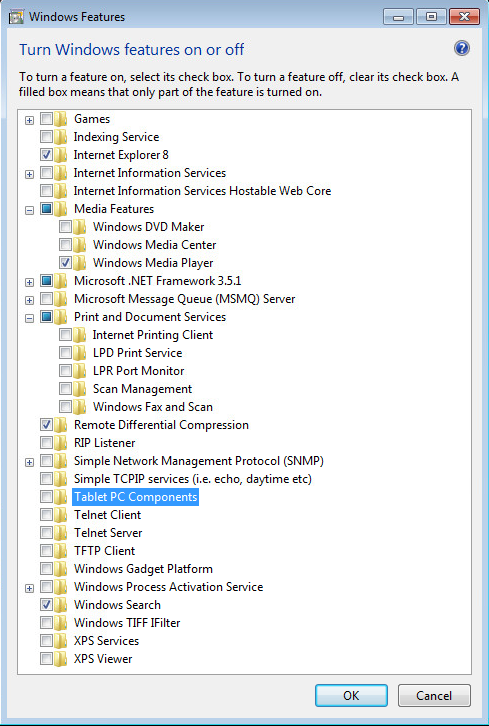
After Windows Updates are finished there are some Windows Features that we don’t need use, lets remove them (optional) :

  • Games
  • Windows DVD Maker
  • Windows Media Center
  • Internet Printing Client
  • Windows Fax and Scan
  • Tablet PC components
  • Windows Gadget Platform
  • XPS Services
  • XPS Viewer

Last item before Sysprep is to erase all event logs, you can do this by running this script in an elevated command prompt:

for /F "tokens=*" %1 in ('wevtutil.exe el') DO wevtutil.exe cl "%1"

Let’s get ready to Sysprep our OS Template and convert to a VM Template for our Gold Images.

Sysprep

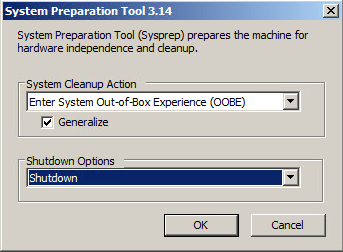
Run sysprep.exe at choose Generalize, OOBE, Shutdown

ConvertToTemplate

Right Click on VM and Choose Template > Convert to Template. Now that we have converted our OS Template into a VM Template we can proceed to cloning our template to build a Gold Image for View Pools. What’s nice about building a VM Template as opposed to moving to a Gold Image to start with is that now I can deploy a quick Test machine or build out Dedicated VM’s without affecting any other images. Also if you use vCloud Director, it will require having images as Templates for provisioning purposes.

Create Gold Images

Now that we have our OS Template built we can clone it to make a Gold Image. We maintain several Gold Images based on scope of work or department. Eventually we will move away from so many Gold Images and start utilizing Horizon Mirage (v2 now supports VDI). Until then let’s build out a Gold Image for our Accounting Department.

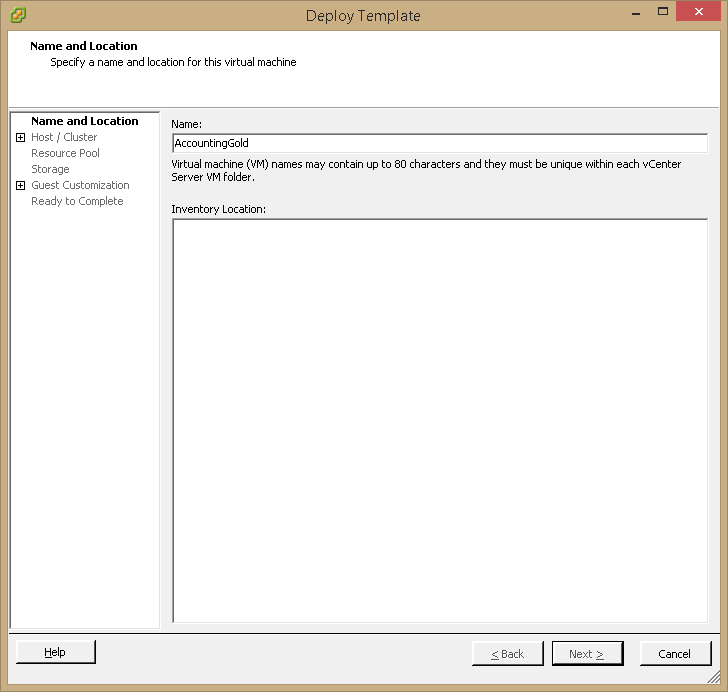
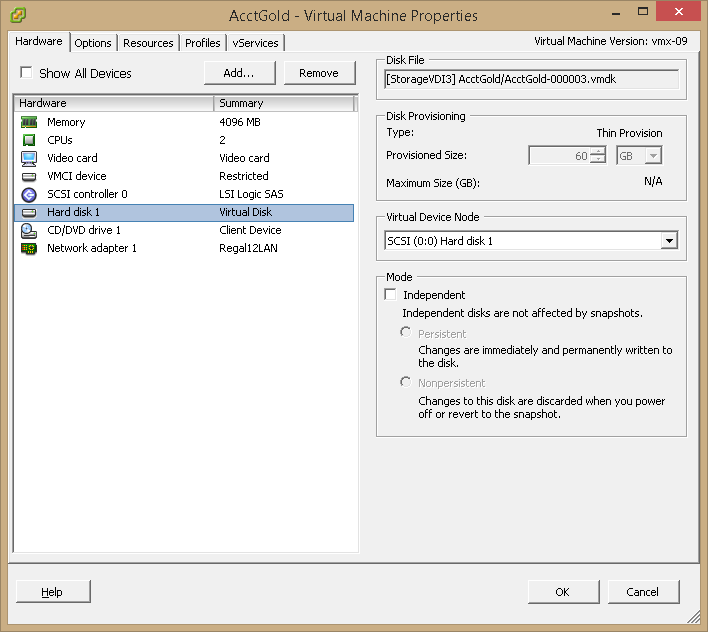
In vCenter let’s clone our Win7Template to make AccountingGold.

DeployTemplate

Each of our View Pools has specific hardware requirements based on the software they use, so let’s make some changes to address some accounting software that we will install. I will enlarge the hard drive to 72GB and increase RAM to 4GB.

TweakHardware

Since we ran Sysprep on the OS Template VM we need to go through the basic Windows Install steps of the new Gold Image. Next join the machine to the domain and reboot. Some people say to join the domain last, but it has been my experience that most software packages are located on a central file server and it makes things easier to authenticate to AD and if you are trying to configure a DSN, SQL or AD specific application.

AdjustBestPerformance

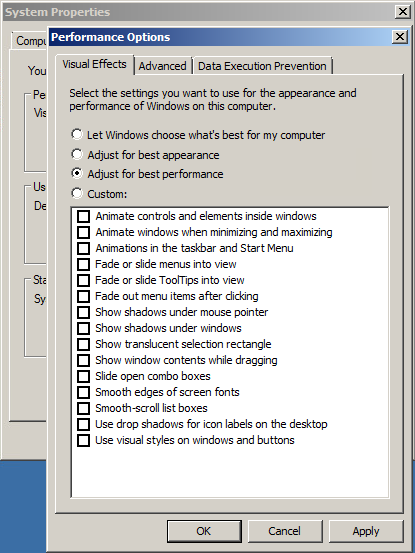
I like to tweak the display properties at this point by going to System Properties > Advanced System Settings > Advanced > Performance > Settings > Adjust for Best Performance. You can also set the Windows Theme to Windows Classic.

Install Core Company/Pool Specific Software

From here the sky is the limit on what you want to install for your Gold Images, we typically install MS Office, Flash, Chrome, Java, etc. For all applications we install, we always do a first run to ensure everything installed correctly. If you install MS Office re-enable Windows Update service and update Office (Internet or WSUS since we are in the Domain now). Once complete, disable Windows Update service and delete updates from:

C:\Windows\SoftwareDistribution\Download

So let’s assume you have installed everything that you want and are ready to provision this image for use by a View Pool, there are several things you want to tweak to make the linked-clone process go smoothly.

SDelete is a slack utility for Windows that will remove any slack in Windows partitions, since we are running our VM’s in Thin Provision I like to make sure my Gold Images are as compact as possible when the Replica’s are produced. You will need to download a copy of SDelete here. To start let’s run a check disk for the system partition:

chkdsk /f

Now we can run sdelete from a run command. NOTE: this will take some time

sdelete -z

Now lets put the Host that our Gold Image is running on into SSH mode. Shutdown your Gold Image and open Putty or your preferred SSH client.

ls
cd vmfs
ls
cd volumes
ls
cd SPECIFIC DATASTORE (Case Sensitive)
ls
cd SPECIFIC VM (Case Sensitive)
ls
vmkfstools -K SPECIFIC VMDK FILE (Case Sensitive)

Hole Punching should take a while but will eventually finish.

Once that is complete, start your VM back up and run chkdsk /f one more time. Also be sure to disable SSH in vCenter. Clear the event logs one more time.

Now let’s build our shutdown script and we will be done with our Gold Image. We use this script to release the Windows KMS key, MS Office KMS Rearm, IP release and shutdown. Create a txt file on the desktop called “script.bat” right-click on bat file and edit, insert the following text and save:

"C:\Program Files (x86)\Common Files\microsoft shared\OfficeSoftwareProtectionPlatform\OSPPREARM"
 slmgr /ckms
 ipconfig /release
 ipconfig /flushdns
 shutdown -s -t 00

Run the script.bat file and your machine is now 100% ready to become a Parent Gold Image for a View Pool, you can take a snapshot and start provisioning a View Pool!

Snapshot

Up next in our 6 Part series is Part 2 – PCoIP Best Practices

VDI Performance Series Index

Part 1 – Gold Images

Part 2 – PCoIP Best Practices

Part 3 – Persistent vs Non-Persistent

Part 4 – Storage

Part 5 – End User Experience

Part 6 – Wrap Up and What’s Next

DFW VMUG User Conference Download

DFW Opening Slide Deck

DFW VMUG held it’s annual User Conference September 25 at the Irving Convention Center and it was a blast. It was great to see so many people that are a part of the VMware community come together and geek out. I even had some of my non-VM coworkers come and learn about some new software and hardware at the Vendor Crawl. It was cool for them to see the journey VMware is on.

13 - 3

Also got a chance to meet up with some of the DFW VMUG members (Nigel, John, Brad, Matt and Me) The keynotes were well prepared and the speakers for the breakout sessions had some great material to present. I couldn’t get to all of them but I attended 4 sessions and wanted to do a session download, we do this at our company anytime someone goes to a conference, it helps to keep everyone informed:

Evolving to the Software-Defined Data Center: EMC Integrations                     – Tommy Trudgen

Tommy Trudgen (vTexan) from EMC gave a great presentation showcasing the evolution of Virtualization and how EMC is helping push the boundaries of the Software Defined Data Center. He illustrated the highs and lows of EMC and how they capitalized emerging software and technologies to keep them moving forward and a leader in the storage market.

VSAN Technical Best Practices                                                                                           – Dan Gillcrist

By the time VSAN had been announced at VMworld, I wasn’t able to get signed up any sessions. I wasn’t going to waste time with Hands On Labs at VMworld so I was really pumped to do a deep dive on the subject. For those that aren’t familiar with VSAN it is VMware’s version of SAN independence and storage convergence. The best example I can give on convergence is Google’s Server Clusters, by storing spinning drives at the nodes instead of centrally storing in a SAN, they couple all the disks into logical arrays. By doing this, you can scale storage and performance on demand as opposed to sizing a SAN prior to implementation and then adding shelves to handle growth, be it expected or not.

That was the quick version, for a more detailed assessment of what VSAN is, check out Duncan’s article at Yellow Bricks, lets dive into some best practices for VSAN.

Automation Generation                                                                                                       – Nick Weaver

Automation is a concept that I am trying to learn more about, this session threw gas on the fire for me. PowerCLI and PowerShell is the start to making vCenter commands more automated, but it doesn’t automate processes, in comes Puppet Labs. Puppet Labs is an automation platform (Purchase and Open Source Models) that the vCloud and vSphere teams use to automate provisioning of Application stacks and other management intensive processes. VMware also makes available all of the Puppet Lab scripts that they use on GitHub.

Think about the last time you implemented a software solution, what was the first thing you did, white papers right? Our company implemented an ERP platform and our install process was over 200 steps just for the servers! Now think about spitting out some code and clicking run….yup! To play with Puppet Labs start with something simple like the vCenter Server Appliance and configure IP, DNS, hostname, etc. In very simple terms, that’s Puppet Labs, check them out and if you have any questions, give Nick Weaver a tweet, also check out another project works on: Project Zombie.

The Emerging Technologies That Will Change VDI                                                   – Mark Vaughn

If you are part of the SLED market (State, Local and Education) then you have probably heard of Presidio, they have implemented VDI solutions in 1/3 of the Nations Colleges that is no small feat. Mark Vaughn gave a compelling presentation of common misconceptions with VDI, areas to avoid, lessons learned and what we can expect from VDI in the near future and how VMware is leading the industry in virtualizing desktops and offering Desktops-as-a-Service (DaaS).

Troubleshooting Storage Performance                                                                         – Brad Pinkston

Storage performance is on every admin’s mind, unless you have a Flash array! Brad gave a high level overview of how storage has evolved with the releases of vSphere 5.5, VSAN, and vFlas Read Cache. I got some good nuggets of information when running esxtop and understanding averages vs peaks, here are some valuable slides on esxtop info.

Disk IO Latencies Disk IO Queues esxtop explained Storage Best PracticesOn top of those valuable slides, he also recommended some tools that can be used to diagnose storage problems and help isolate the problem:

All in all it was a great User Conference, this was my first and will not be my last. Up next VMworld Barcelona is going on right now and then later in October VMworld on the Road is coming also, check those out if you can!

VDI Performance Series – Let’s Do This

What is all this talk about VDI?

VDI is a virtual desktop infrastructure designed to provision desktops as a service to the end user. The desktops are stored in the datacenter typically using a Host – Shared Storage scenario. End Users can connect to these Virtual Desktops using Hardware thin/zero client endpoints or a variety of software clients on PC, Mac, iOS, or Android. You can do a P2V for existing machines or build out “Pools” of desktops for specific use cases or by departments.

VMware’s VDI solution is called Horizon View, which is now part of the Horizon Suite. There are various components that make up Horizon View, I’m not going to go into that here because we are focusing primarily on VDI performance.  I’ve included a diagram of what a typical VDI environment would look like.

VMware-View-Layout

Our company made the decision to deploy VMware’s VDI solution Horizon View (as of 5.2) about 18 months ago. The adoption rate has been incredible, we began with a small test group of 15 users, mainly administrative, task workers and some advanced workers. Our test group rapidly became our production group as we went from 15 to over 100 in less than 6 months.

Fast forward to today and we have almost 200 desktops deployed on View and there isn’t any sign of us slowing down, we have about 80% of our staff on VDI and the other remaining users begging for the “black box”. They just flip out when they can swtich from a Zero Client station to their iPad to a conference room and back again!

With fast growth comes scaling problems, and we have encountered our fair share of them. First it was battery backup, then it was inadequate cooling, now it is performance. VMware has some great articles about industry Best Practices when deploying View, but there is much more information out there, some from VMware and not.

My goal is to lay out the hurdles that we have overcome with VDI performance, the lessons I’ve learned and what we are planning on doing in the future.

Part 1 – Gold Images

Part 2 – PCoIP Best Practices

Part 3 – Persistent vs Non-Persistent

Part 4 – Storage

Part 5 – End User Experience

Part 6 – Wrap Up and What’s Next

Look for the 6 Parts over the next several weeks.