Horizon View & vSGA – Part 2 – Install and Configure

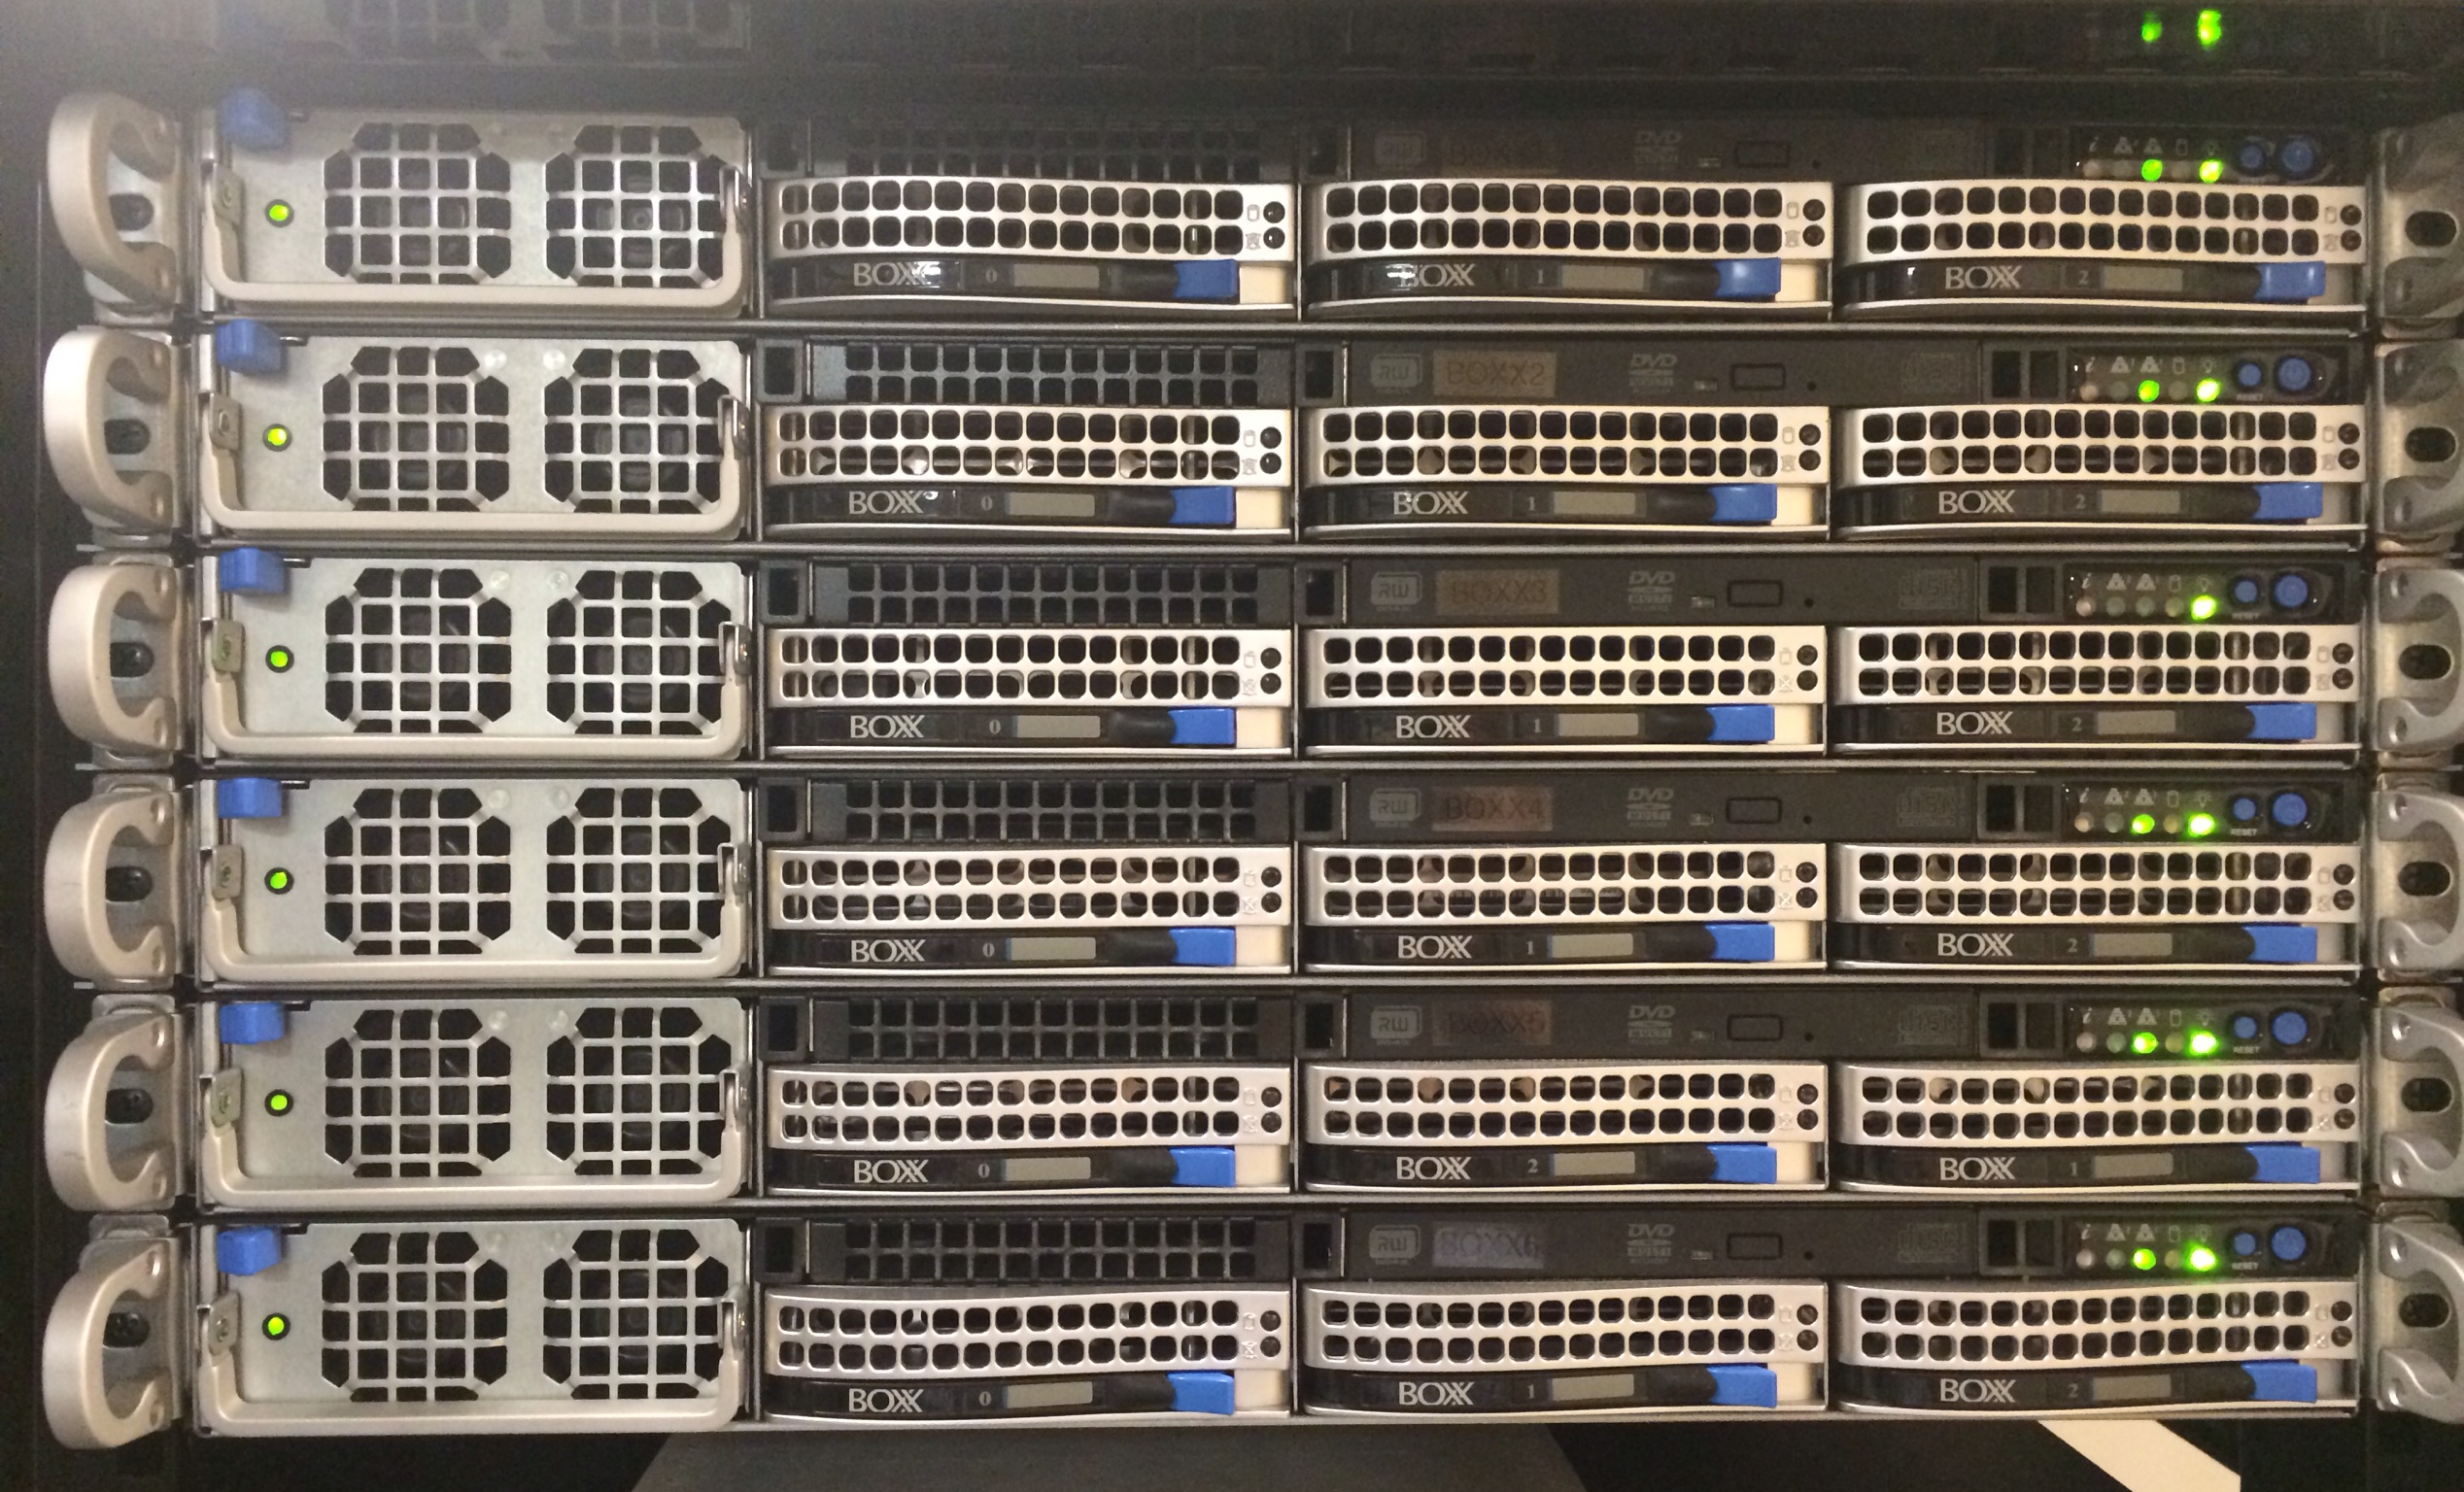
In Part 1, we reviewed all the different options for virtualizing graphics with Horizon View, now it is time to get our hands dirty. First we decided to go with vSGA instead of vDGA for the ability to vMotion workloads to various hosts if needed. The hosts that we started with needed a RAM upgrade and a SAN connectivity card because we are doubling the load capacity on each host and need to connect to our shared storage. Here are the before and after specs for each host:

  • Supermicro X9SRG-F 1U Host
  • Intel Xeon E5-2643 @ 3.30 Ghz
  • 16GB DDR3-1600Mhz RAM (Upgraded to 32GB)
  • Dual Gigabit NICs (MGMT and LAN)
  • IPMI Port (For Console Access)
  • Intel X540-T2 (Installed for SAN Connectivity)
  • USB Flash Drive (ESXi Boot Partition)
  • PNY NVIDIA Quadro 4000 2GB Graphics Card

Lets power down the host, physically install the RAM and Intel X540-T2 card and start preparing to install VMware ESXi 5.1 U1. For future releases of View 5.3 and beyond we will install ESXi 5.5 but for now we are staying on View 5.2.

Next we will install ESXi 5.1 U1, this is a straight forward process.

Everyone has a different way of configuring ESXi, some use Host Profiles some don’t. All I will do for now is configure a single MGMT NIC, set the DNS name and disable IPv6. Once I add the host to my cluster, I will run a Host Profile Compliance Check for the remaining settings. Host will reboot, once I have confirmed that ESXi came up properly I’m going to shut it down and move it back into our datacenter. Now for the fun parts!

Now our host is powered up, I can join it to my cluster and start loading the Intel and NVIDIA VIB’s (VMware Install Bundles). I love using PowerCLI when I can so I will deploy ESXi to all of my hosts and get them joined to the cluster and run this fancy command to enable SSH on all Hosts and start the VIB upload process:

Get-Cluster "CLUSTER NAME"| Get-VMHost | ForEach {Start-VMHostService -HostService ($_ | Get-VMHostService | Where {$_.Key -eq “TSM-SSH”})}

Time to fire up Putty (or your preferred SSH Client) and WinSCP to transfer your VIB bundles in the /tmp/ folder for each host. Install the VIB packages running the following command in Putty:

esxcli software vib install -d /tmp/software-version-esxi-version-xxxxxx.zip

After I installed the VIB’s I need to reboot each host, start SSH and Putty back in to confirm a few things and get the NVIDIA services started. Verify that the NVIDIA VIB was loaded successfully:

esxcli software vib list | grep NVIDIA

Because these Hosts have only once graphics card I need to tell ESXi to release the card and allow it to be virtualized so I will run this command to find the PCI ID of the Graphics Card:

lspci | grep -i display

I receive the following response:

00:04:00.0 Display controller: NVIDIA Corporation Quadro 4000

Then I will set the ownership flag of the Quadro Card in ESXi:

vmkchdev -v 00:04:00.0

Verify that the xorg service is running, if not then run the following commands:

/etc/init.d/xorg status
/etc/init.d/xorg start

Now that everything is set up we can confirm that ESXi has grabbed the Graphics Card and we can start monitoring GPU resources. So let’s see how much Graphics Memory we have reserved for VM’s by invoking the gpuvm command:

gpuvm It shows that there is 2GB of Video RAM and a VM is reserving some already!

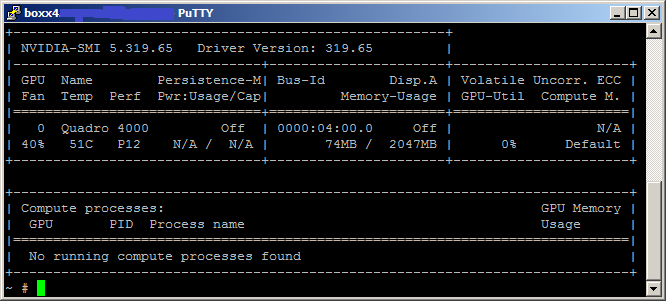
Next, I will run the SMI interface in watch mode to constantly monitor the performance of the Graphics Card this allows me to see how much resources I have available.

watch -n 1 nvidia-smi

nvidia smi

Now its time to configure a Pool of VM’s that can utilize the vSGA settings that we configured and see the results of our work in Part 3!

Advertisement

Horizon View & vSGA – Part 1 – Intro

Since we have stepped up storage by throwing SSD’s at the problem, we now are on to the next task of getting the best graphics experience to our end users. For too long people have relied on mammoth workstations with big graphics cards to get the job done. We have  purchased several big time workstations to address our CAD and Modeling Teams. Doesn’t that fly in the face of Desktop Virtualization and consolidating all processes to the Datacenter. So the next logical step in the evolution of VDI is to virtualize 3D graphics.

Now that sounds like an easy task in this day and age of Apple’s motto of “it just works”, but imagine the time and dedication it took to create the first hypervisor. CPU and RAM are one thing, specific processing threads rendering graphics is very specific and takes time to perfect. VMware started with SVGA and Soft3D with View 5.0 and they have made major strides in graphics utilization. That being said VMware announced two exiting features in Horizon View 5.2, vSGA and vDGA. I will give a quick summary of both, but for more detailed information head over to Andre Leibovici’s Blog for a full breakdown of what they mean. Here is also the VMware White Paper of the complete line of Graphics Acceleration Deployment.

vSGA – Virtual Shared Graphics Acceleration

horizon view vsga

vSGA gives you the ability to provision multiple VM’s (Linked-Clones or Full VM’s) to single or multiple GPU’s. Graphics cards are presented to the VM as a software video driver and the graphics processes are handled by an ESXi driver (VIB). Graphics resources are reserved on a first come first serve basis so sizing and capacity is important to consider. You can also have various Pool types on a host and not all need graphics, this is important if you have various workstation classifications running in a cluster. vSGA is a great solution for users that require higher than normal graphics needs, rendering 1080p video, Open GL, DirectX, etc. We will get into configuring pools for vSGA but there are 3 options: Automatic, Software and Hardware.

vSGA Hardware Compatibility List
  •  GRID K1
  • GRID K2
  • Quadro 4000
  • Quadro 5000
  • Quadro 6000
  • Tesla M2070Q
vDGA – Virtual Dedicated Graphics Acceleration

horizon view vdga

vDGA differs from vSGA in that the Physical GPU is assigned to the VM using DirectPath I/O so the full GPU is assigned to a specific machine. vSGA allows multiple VM’s to provision resources from the GPU, with vDGA you install the full NVIDIA GPU Driver Package to the VM and the Graphics Card shows up as hardware in Device Manager. In Horizon View 5.2 vDGA is still in Tech Preview but is full availability with View 5.3. Below is the list of compatible NVIDIA GPU’s for vDGA. There are limitation to vDGA including no Live vMotion, once GPU resources are exhausted on your Host no other VM’s can be powered on, also because of the nature of the NVIDIA driver Full VM’s are required not Linked-Clones or View Composer based VM’s.

vDGA Hardware Compatibility List
  •  GRID K1
  • GRID K2
  • Quadro K2000
  • Quadro K4000
  • Quadro K5000
  • Quadro K6000
  • Quadro 1000M
  • Quadro 2000
  • Quadro 3000M
  • Quadro 4000
  • Quadro 5000
  • Quadro 6000
  • Tesla M2070Q

So now that we have a basic understanding of what vSGA and vDGA mean, we can start to realize the pros and cons of both technologies. For this first dive into virtualized graphics we decided to start with vSGA because of the ability to run other VM’s on it, since we are testing in a lab and not production, right! Our test equipment that was used was a re-purposed Supermicro 1U Server. Full Specs below:

  • Supermicro X9SRG-F 1U Host
  • Intel Xeon E5-2643 @ 3.30 Ghz
  • 32GB DDR3-1600Mhz RAM
  • Dual Gigabit NICs (MGMT and LAN)
  • Intel X540-T2 (SAN)
  • USB Flash Drive (ESXi Boot Partition)
  • PNY NVIDIA Quadro 4000 2GB Graphics Card

BOXX Hosts

We will jump into the installation and configuration in Part 2!